Stock Transfer
All stock transfers that you created will be shown here.
Export Stock Transfer
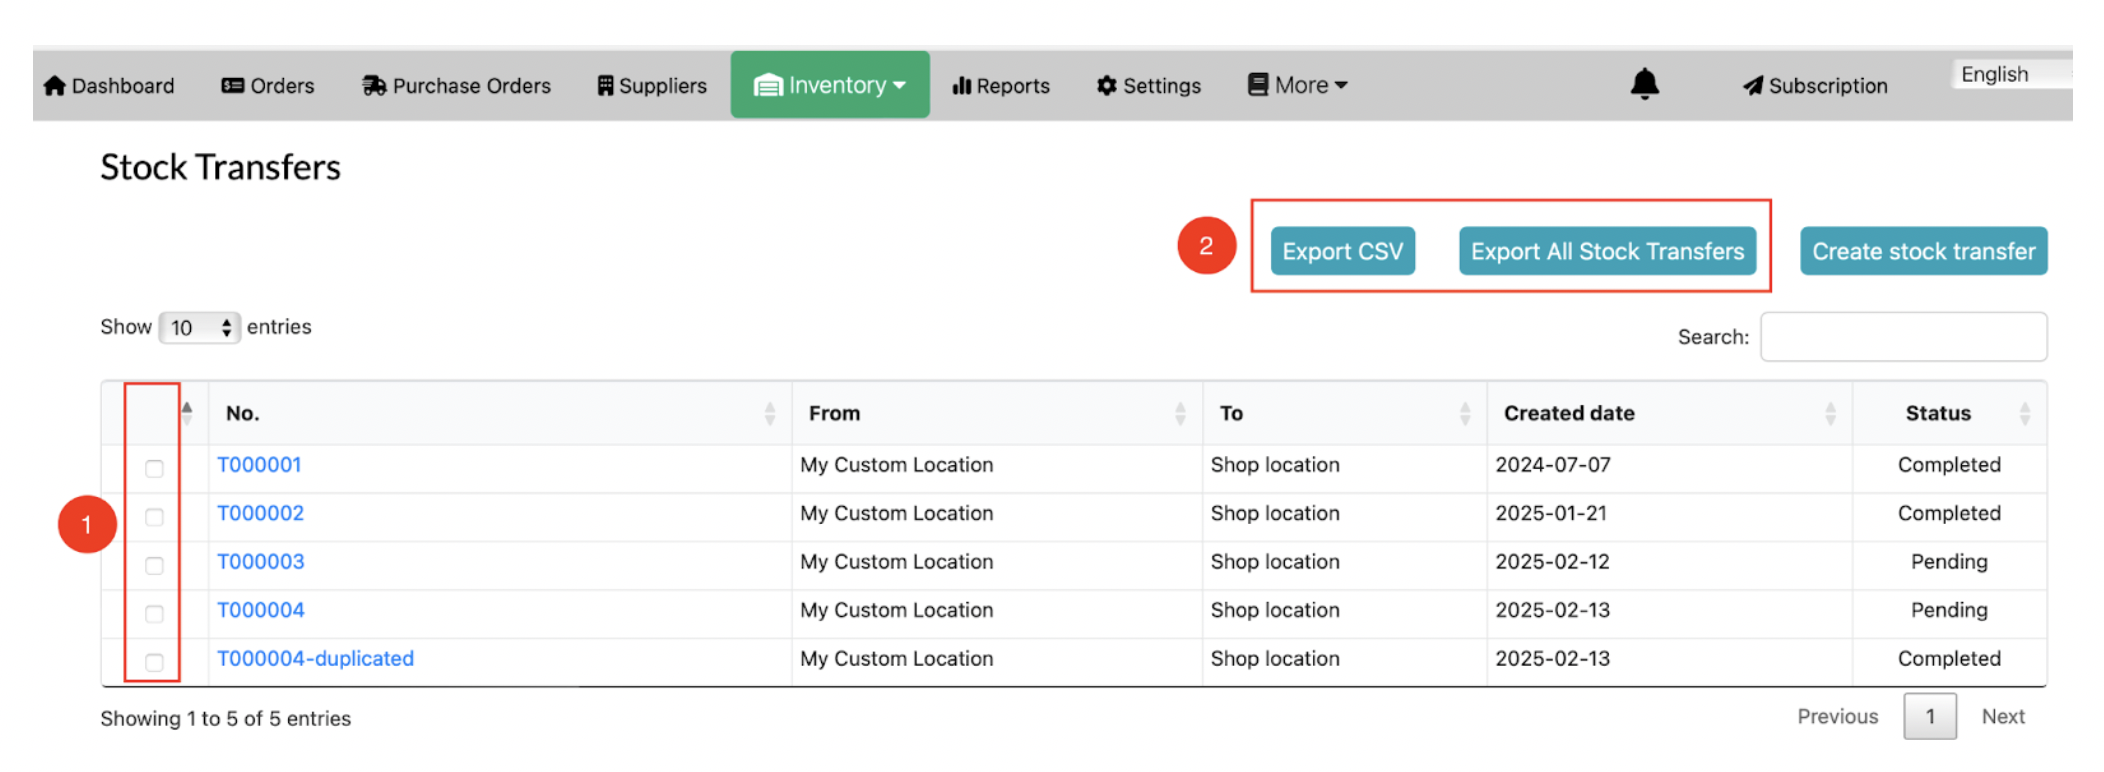
- Choose Stock Transfer
- Click on the Export/Export All button.
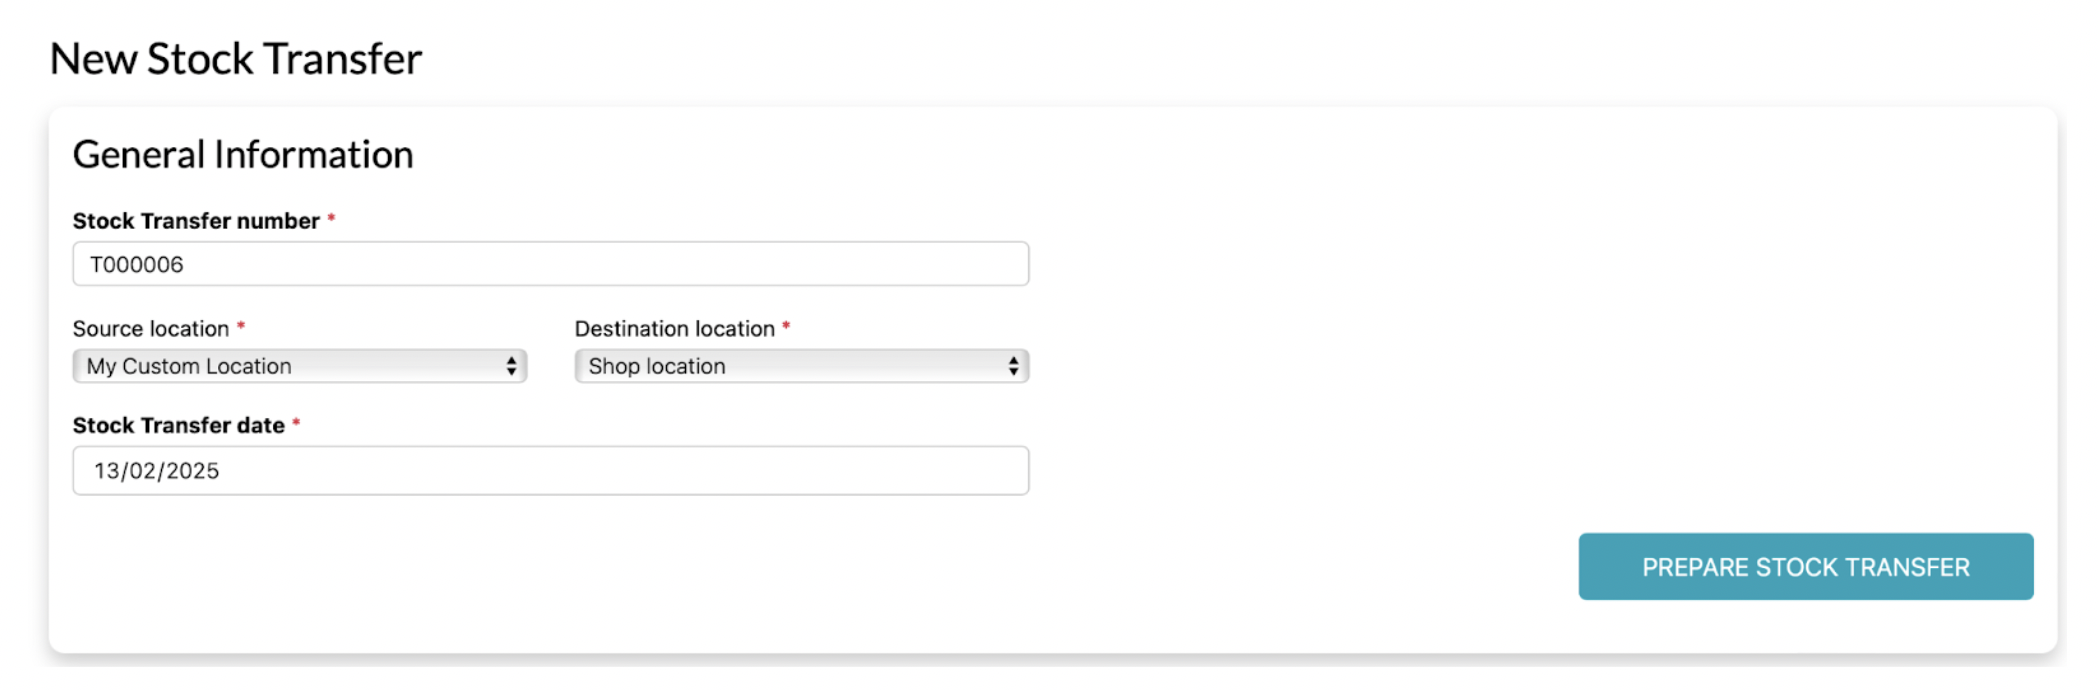
Create a new stock transfer
-
Step 1: Fill in General Information.
- Stock Transfer number: The number of the stock transfer.
- Source location: Choose the current location of products.
- Destination location: Choose the location that you want products to be transfered to.
- Stock Transfer date: The time you create a stock transfer.
When you complete, click on the Prepare Stock Transfer button.
-
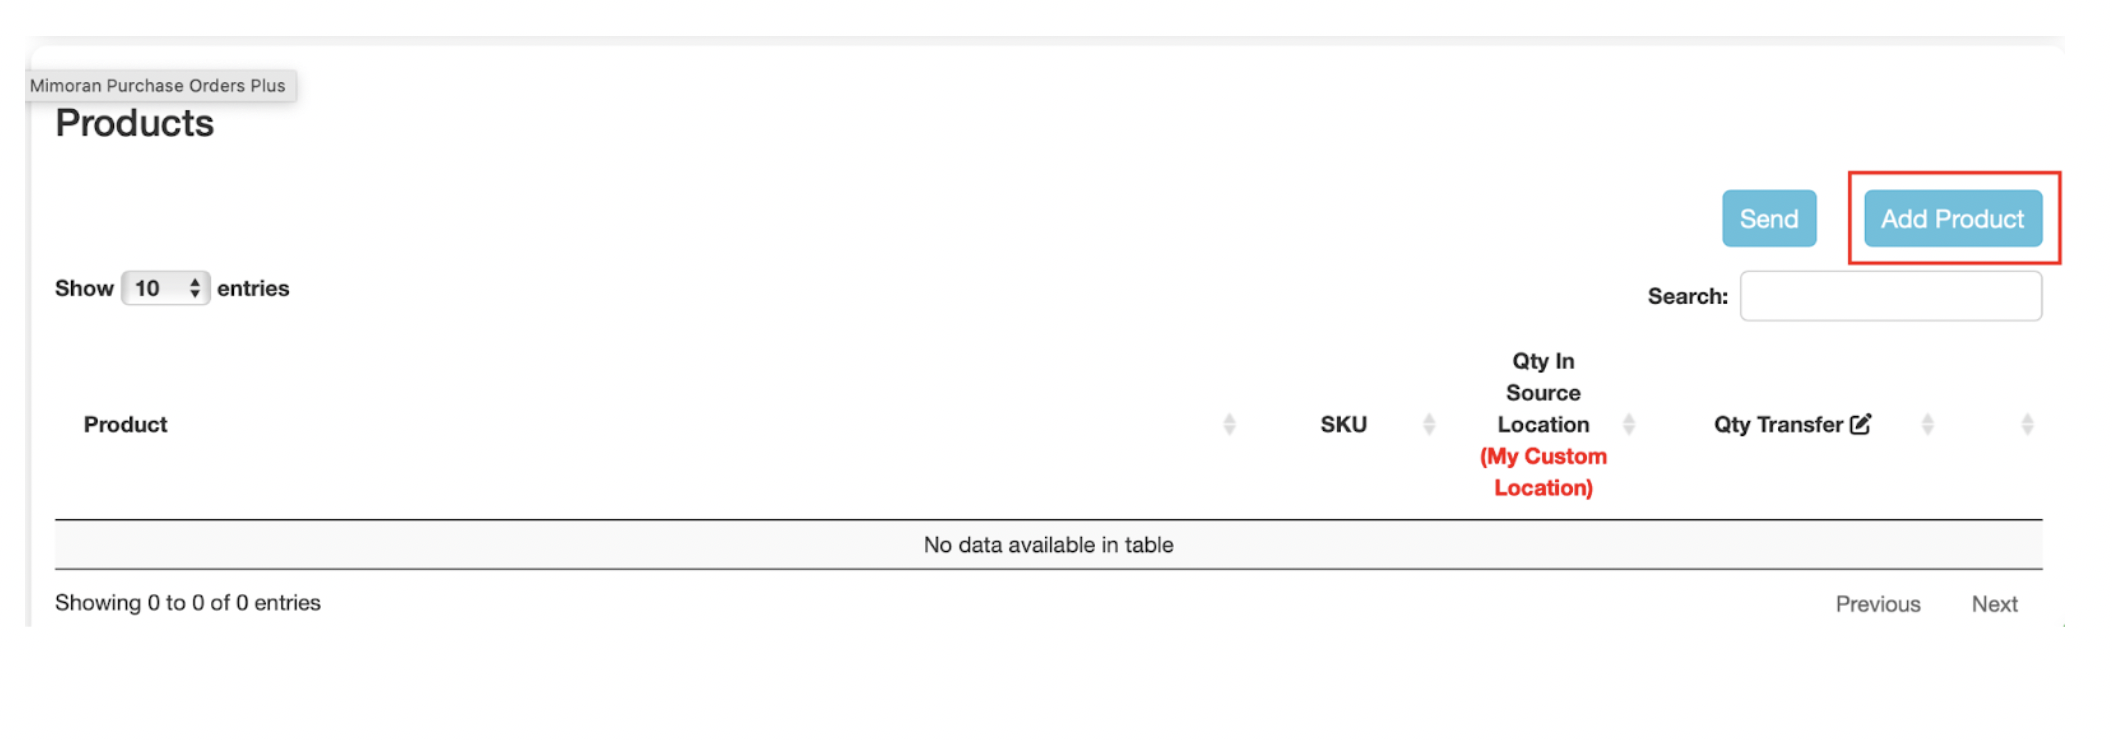
Step 2: Add Product
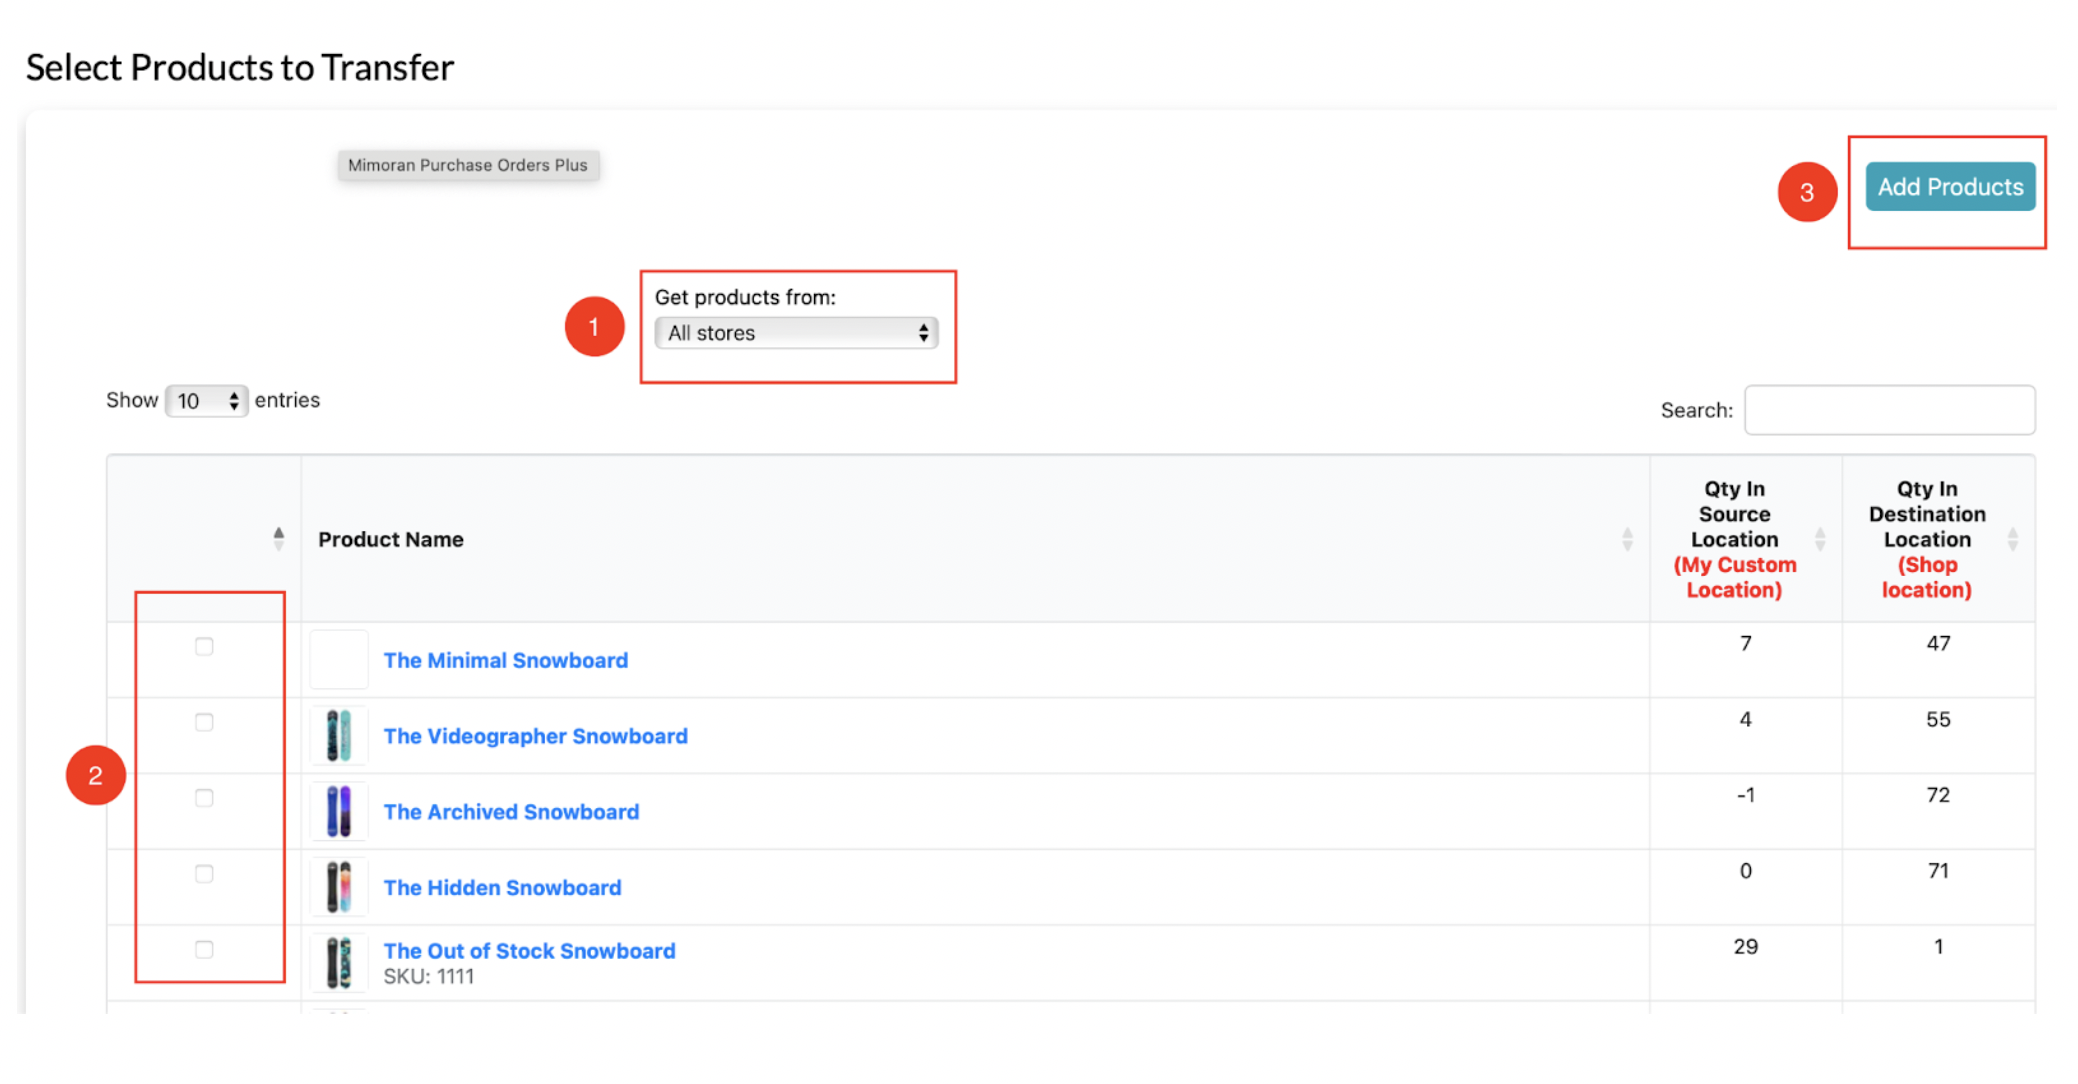
- Choose the location
- Tick on your wanted products
- Click on the Add Products button.
-
Step 3: Edit Qty Transfer
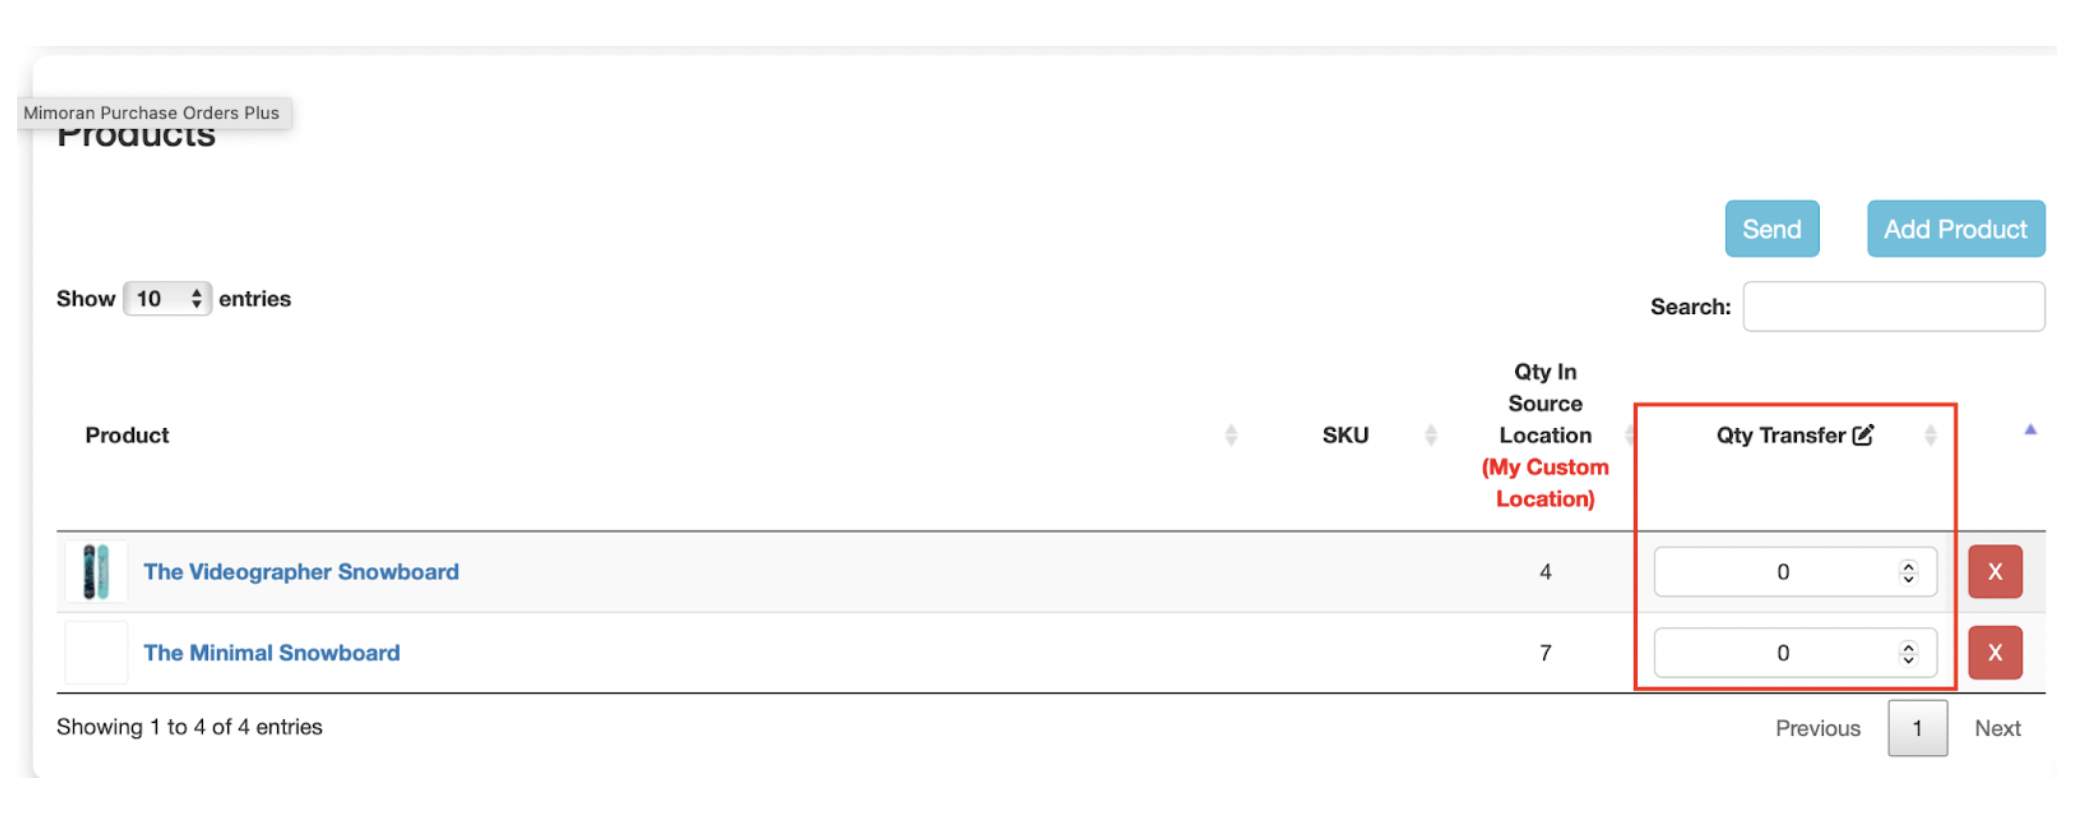
The products you have added will be listed here. Just edit the Qty Transfer.
Then, click on the Save button.
Edit Stock Transfer
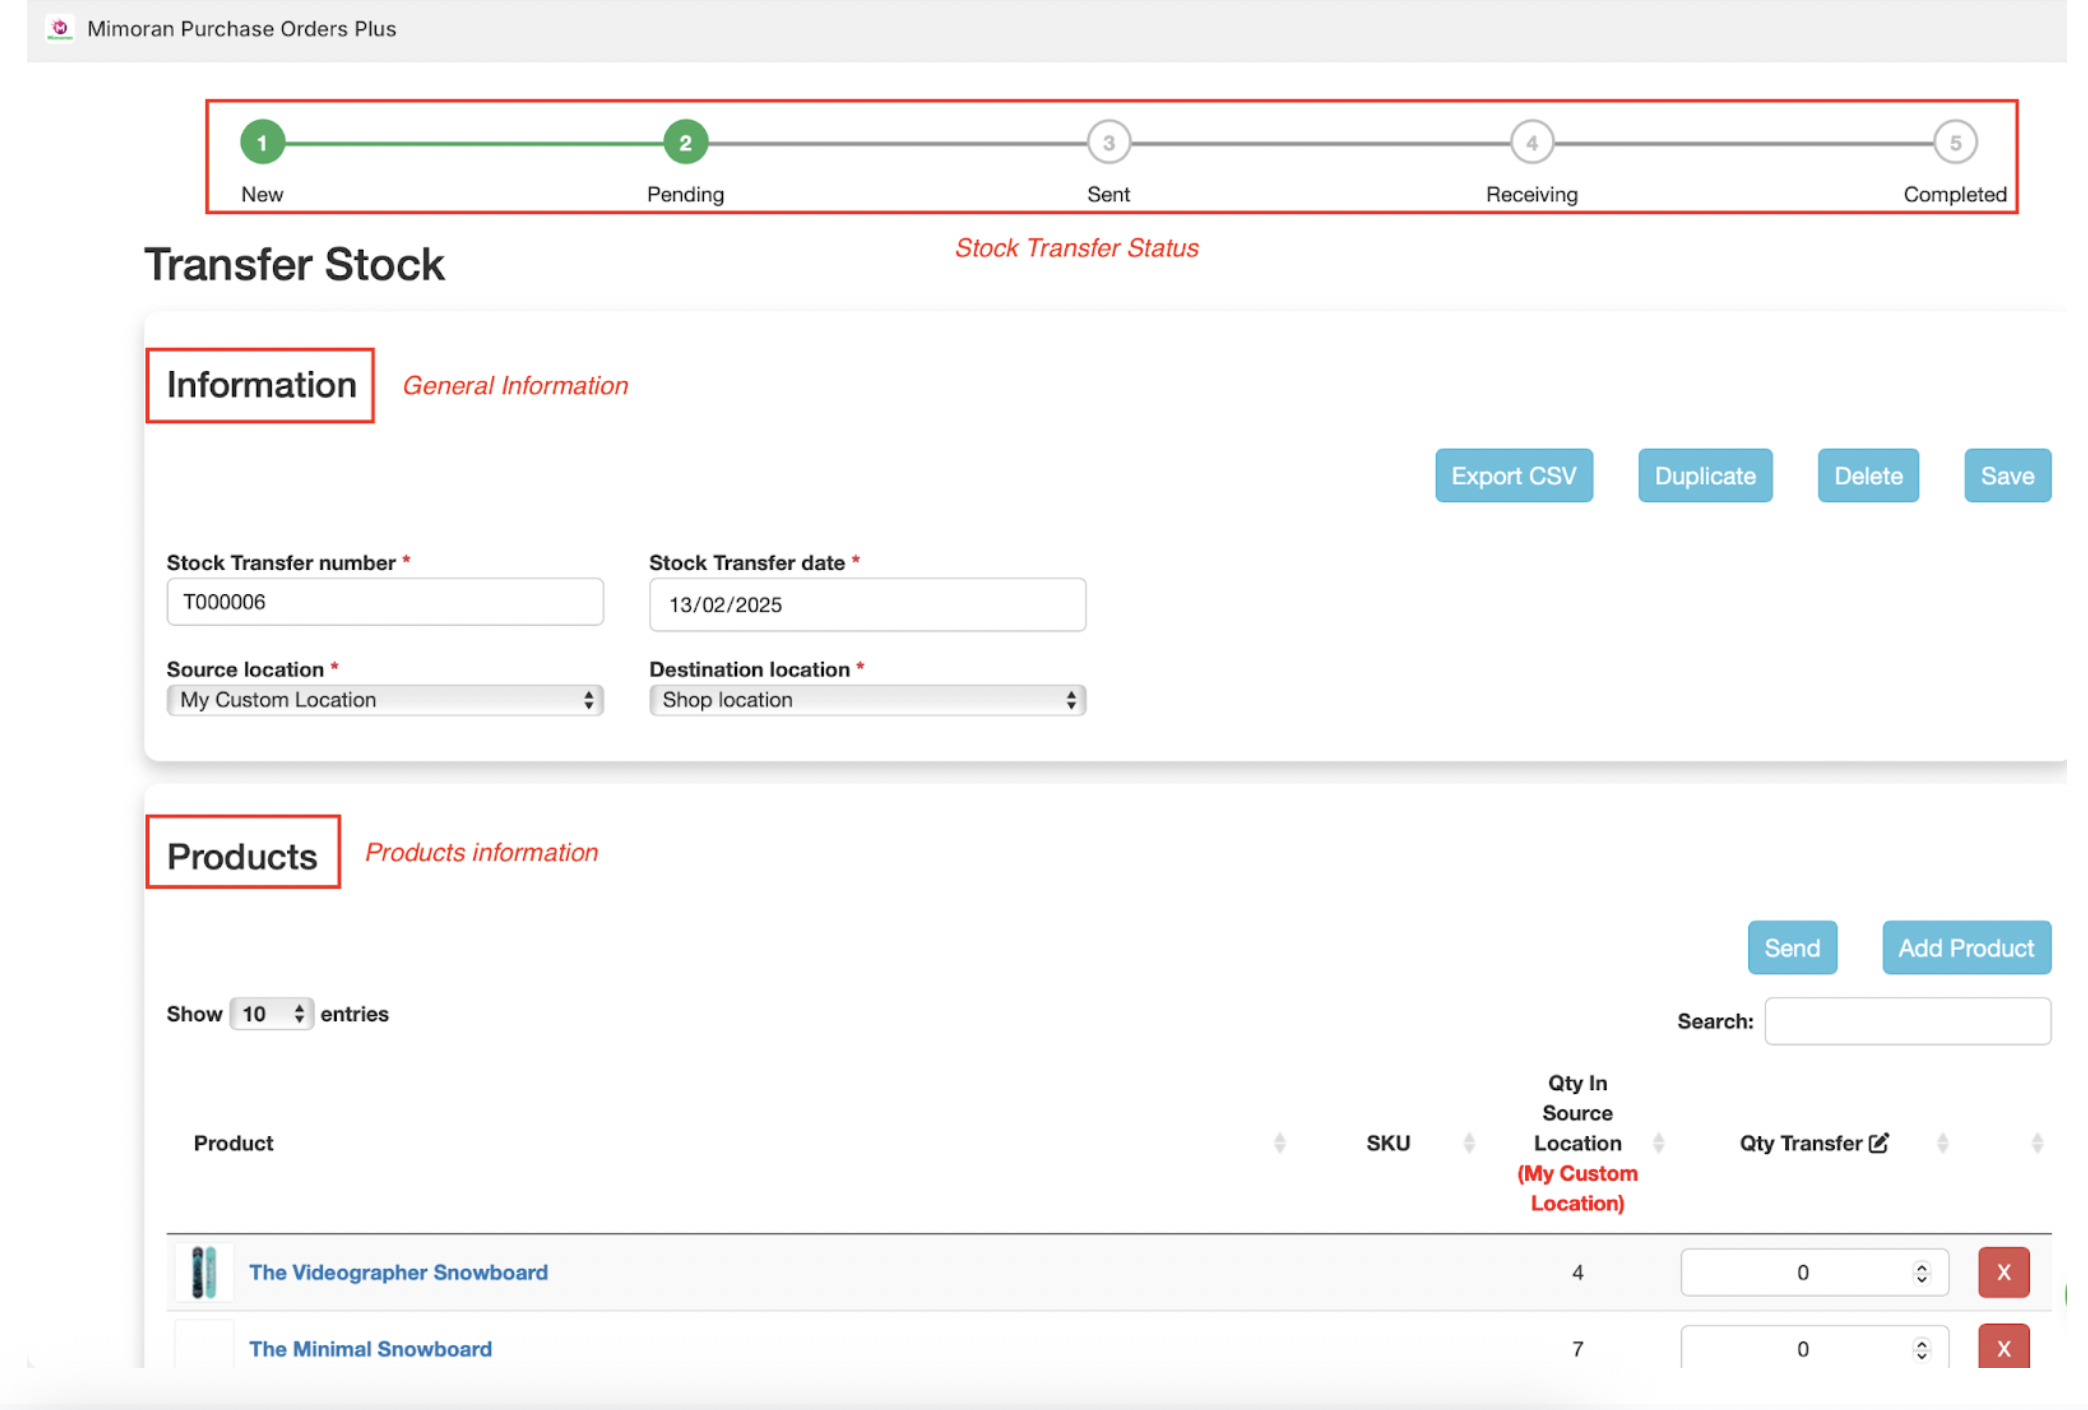
When you click on a stock transfer to edit, there are 3 main parts: Stock Transfer Status, General Information and Product Information.
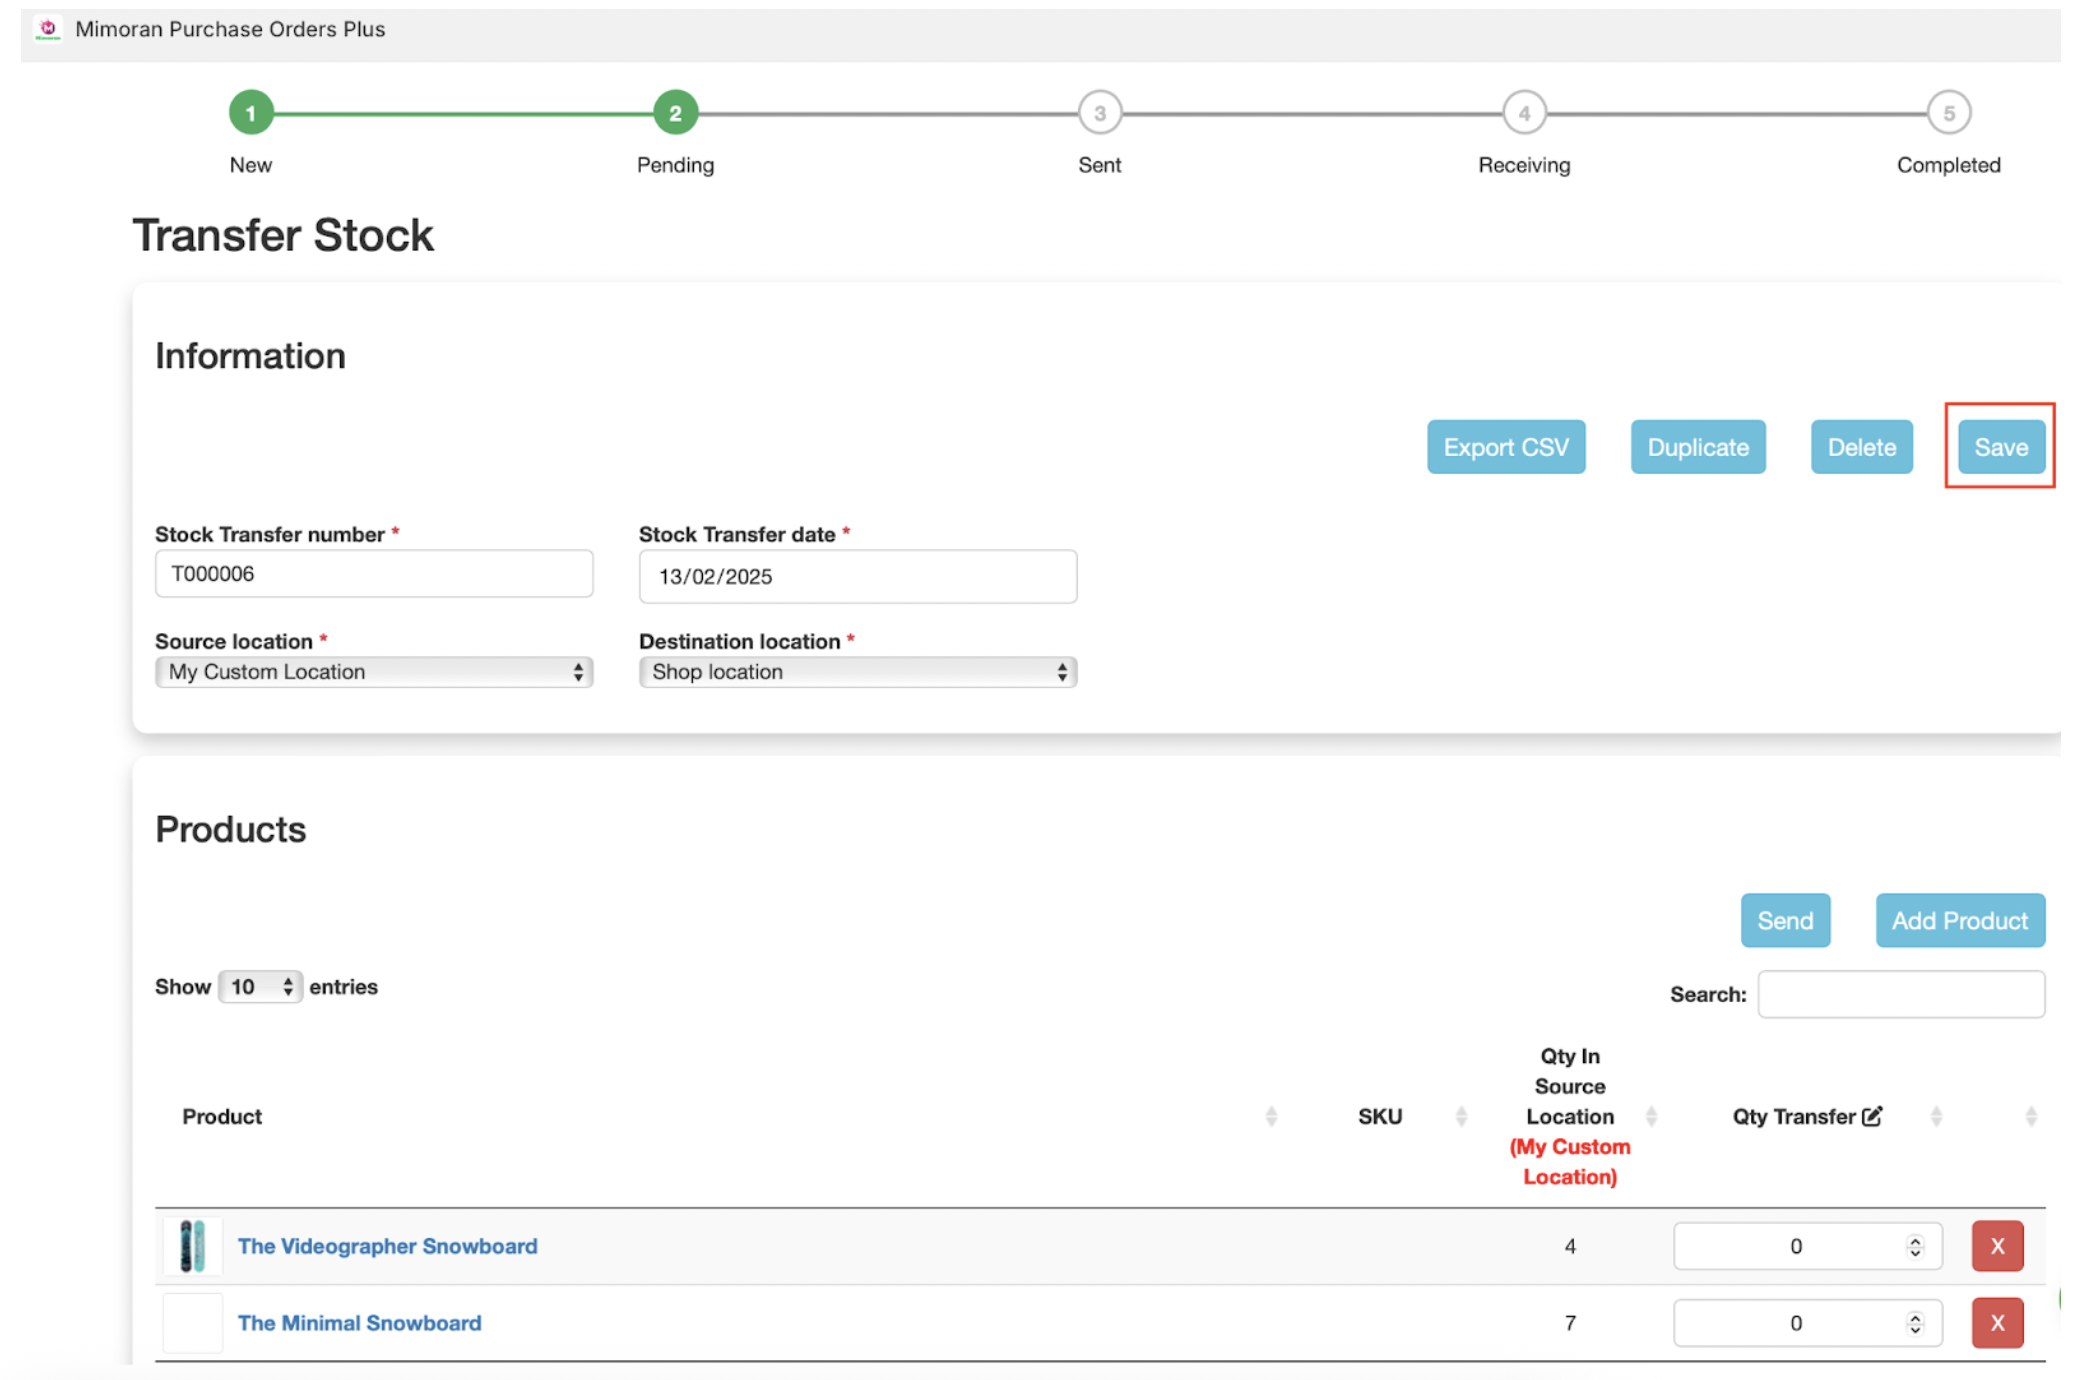
On General Information, edit the field needed. You can also export stock transfer to csv file, duplicate or delete it.
On Product information, click on the Send button to start sending products. A popup will appear.
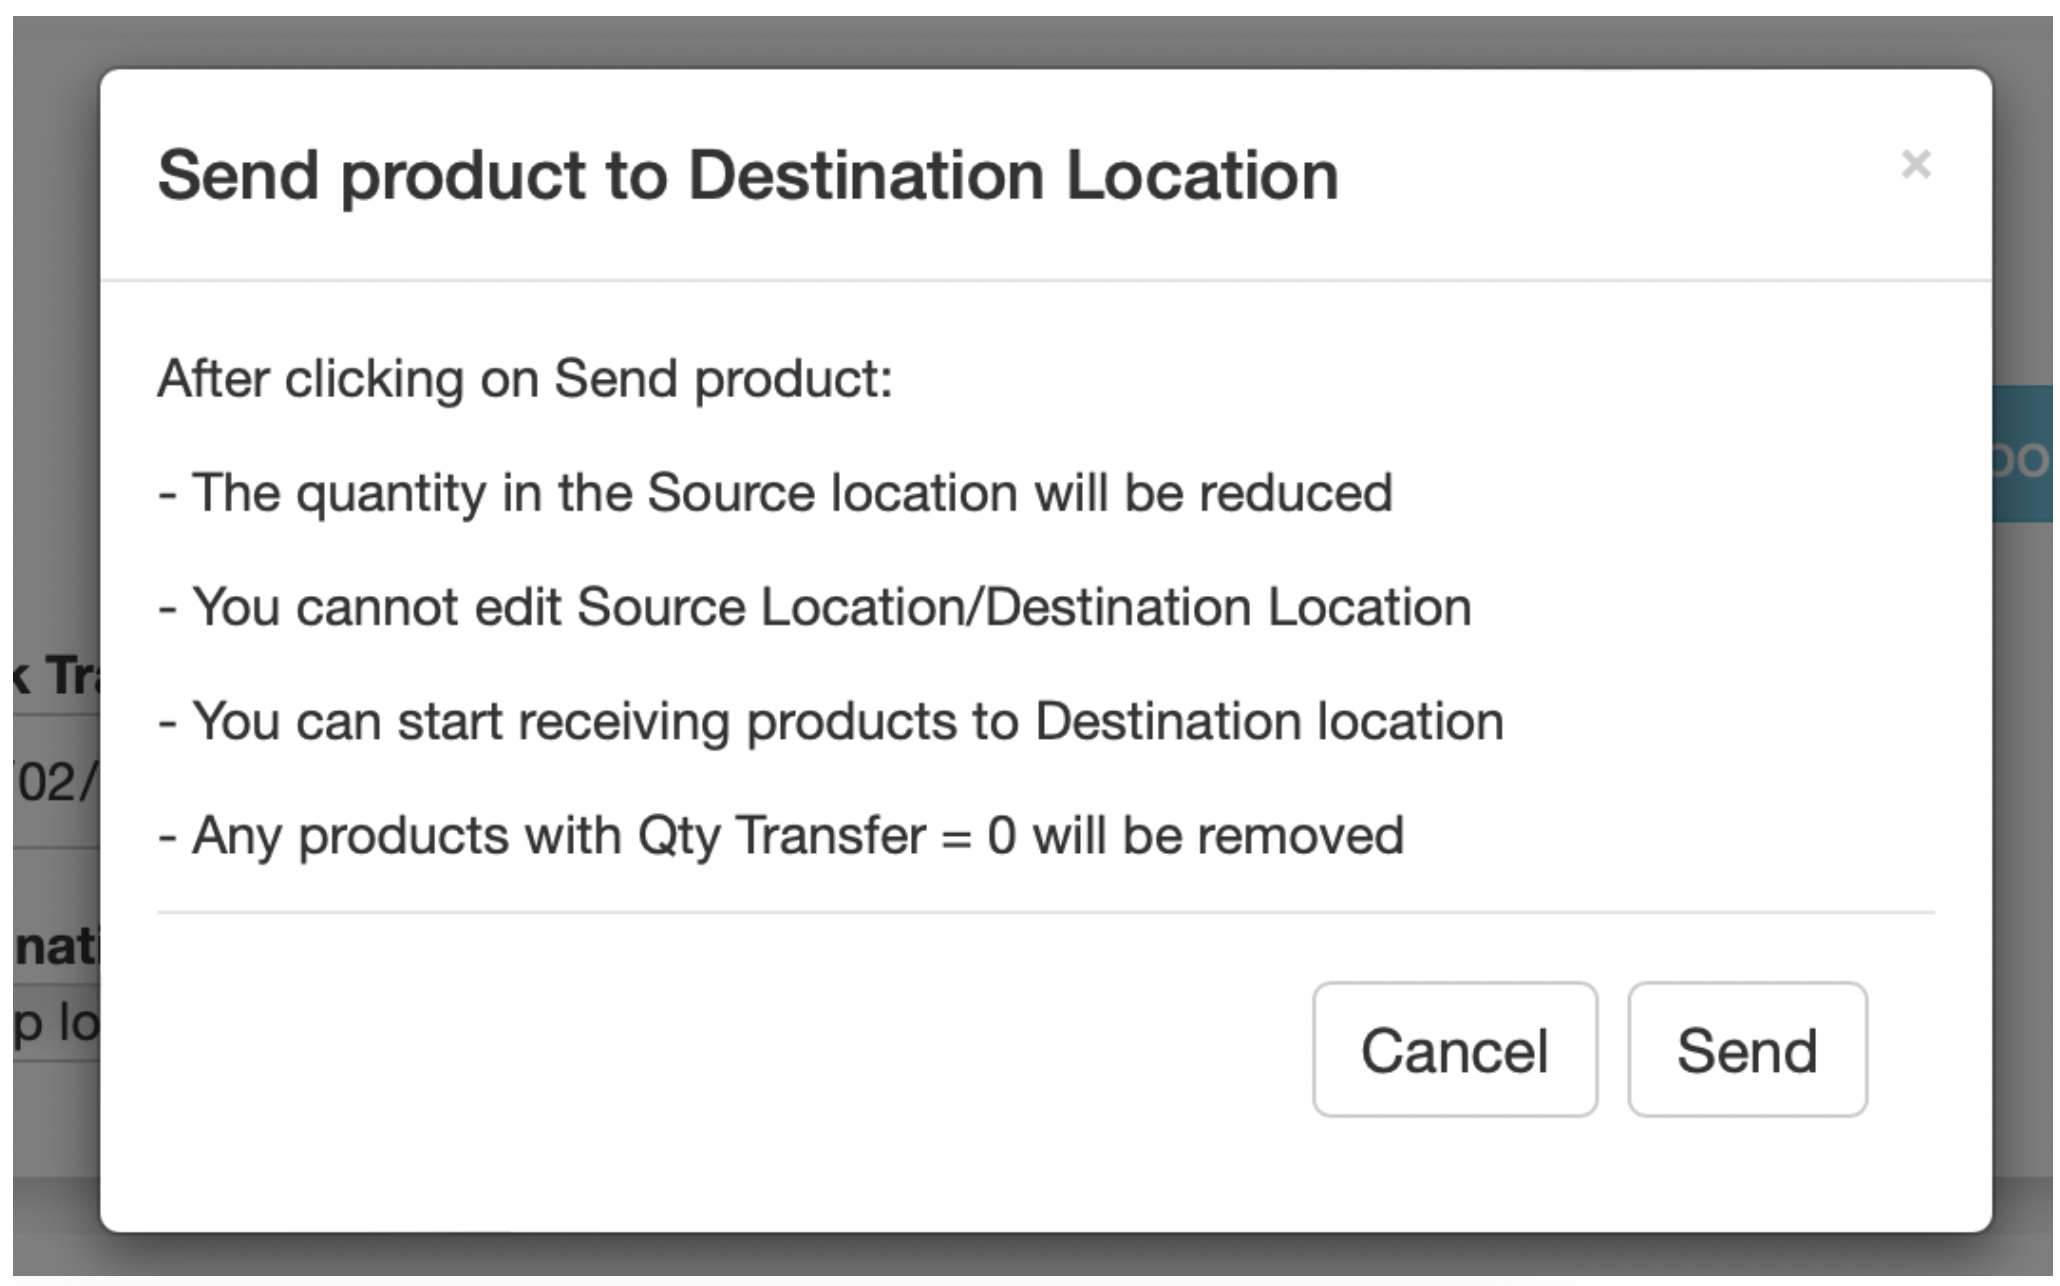
Please check some notes and click on the Send button.
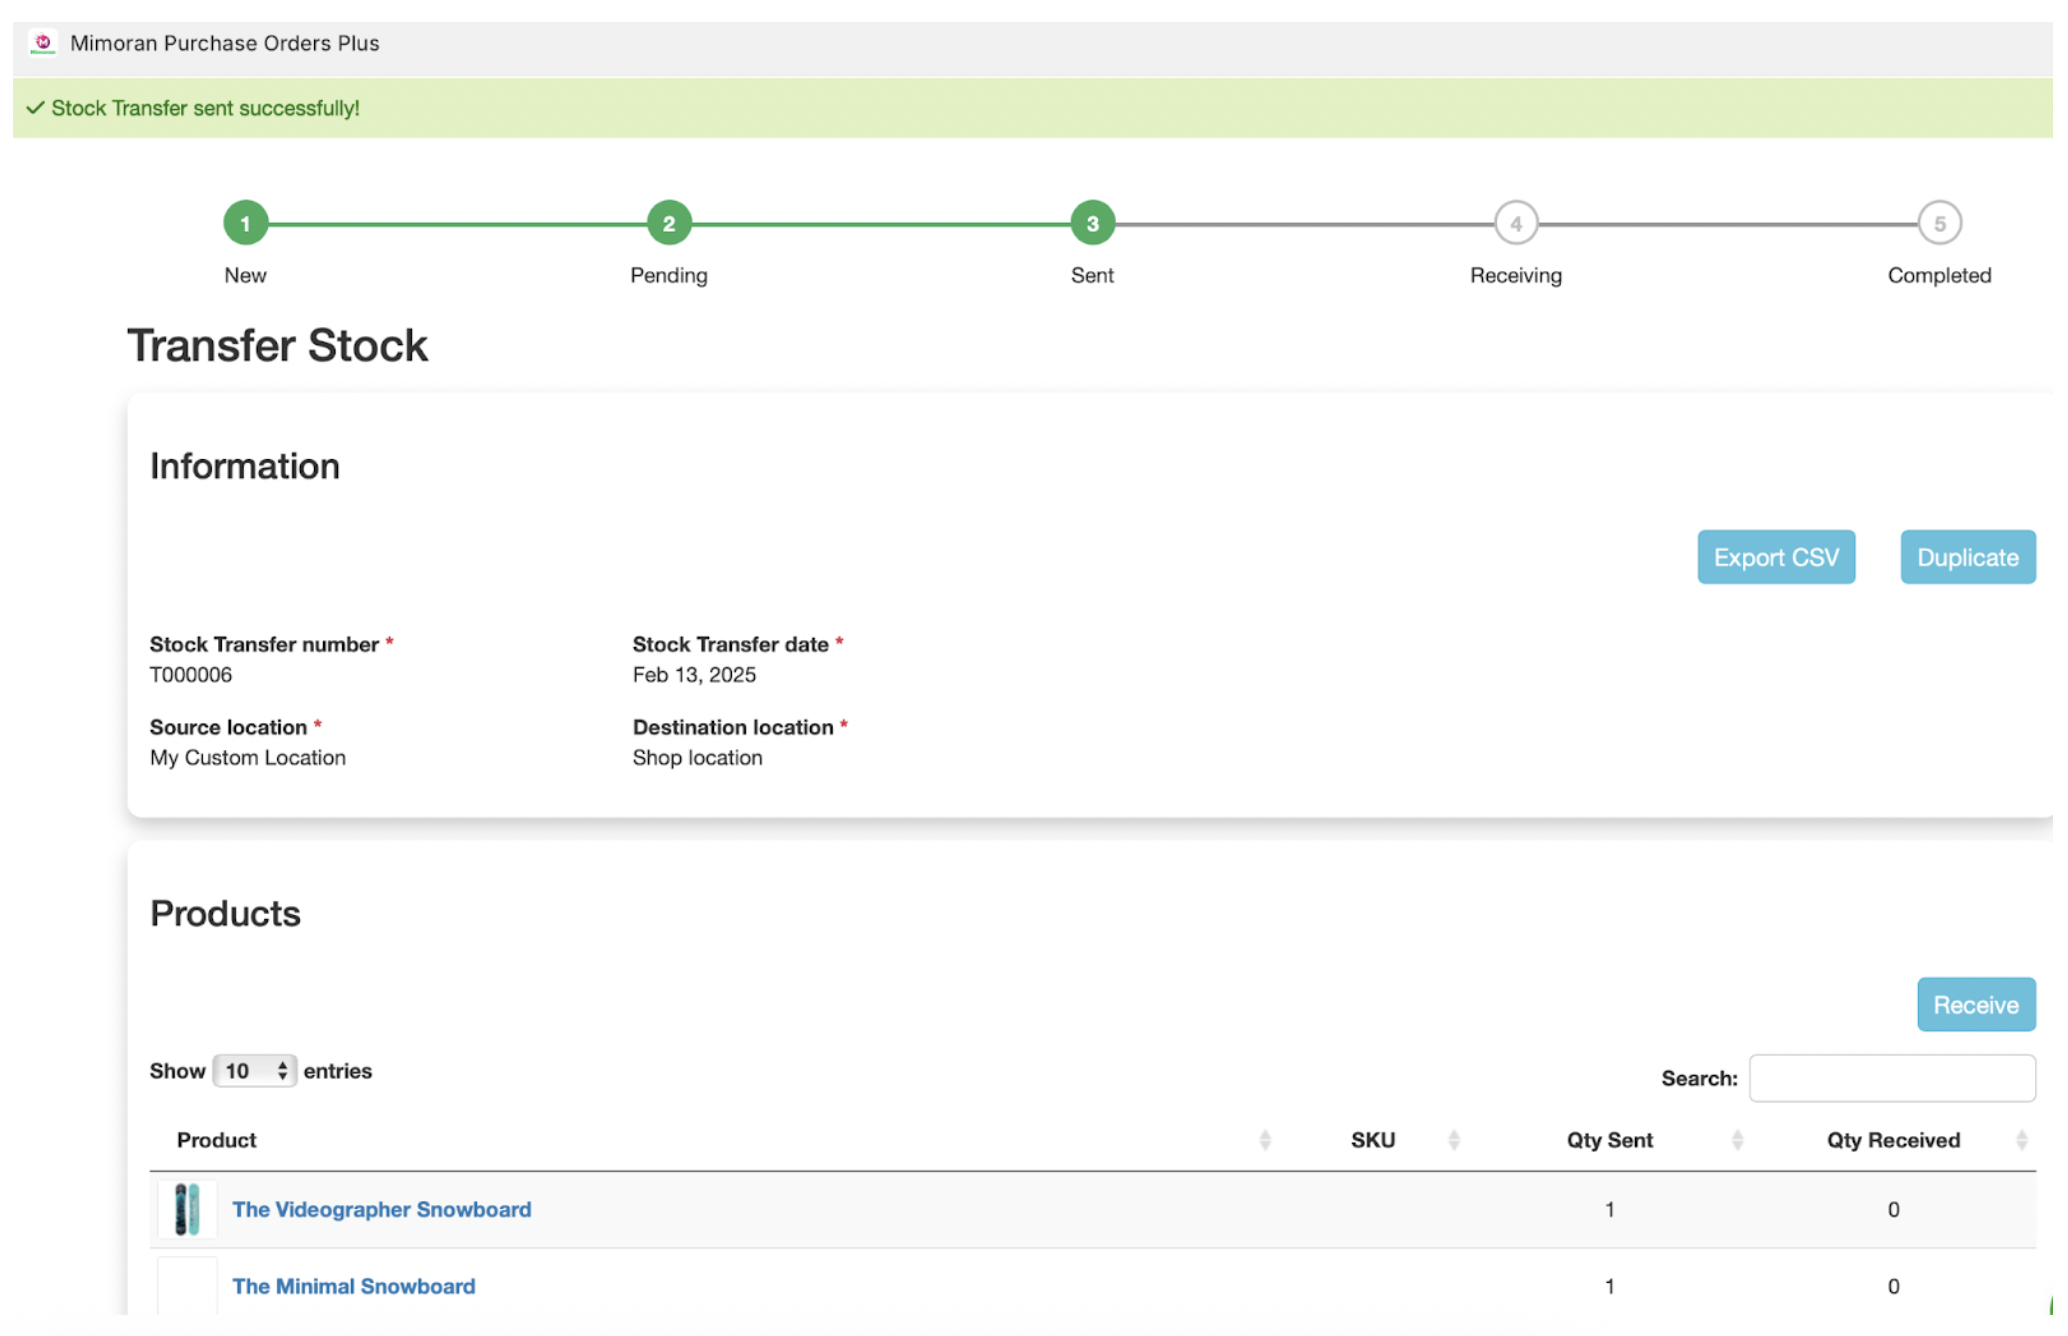
After that, you will see a notification of success sending; the status is changed to Sent and other information of the stock transfer.

If the products are delivered successfully to the destination location, choose the Receive button.
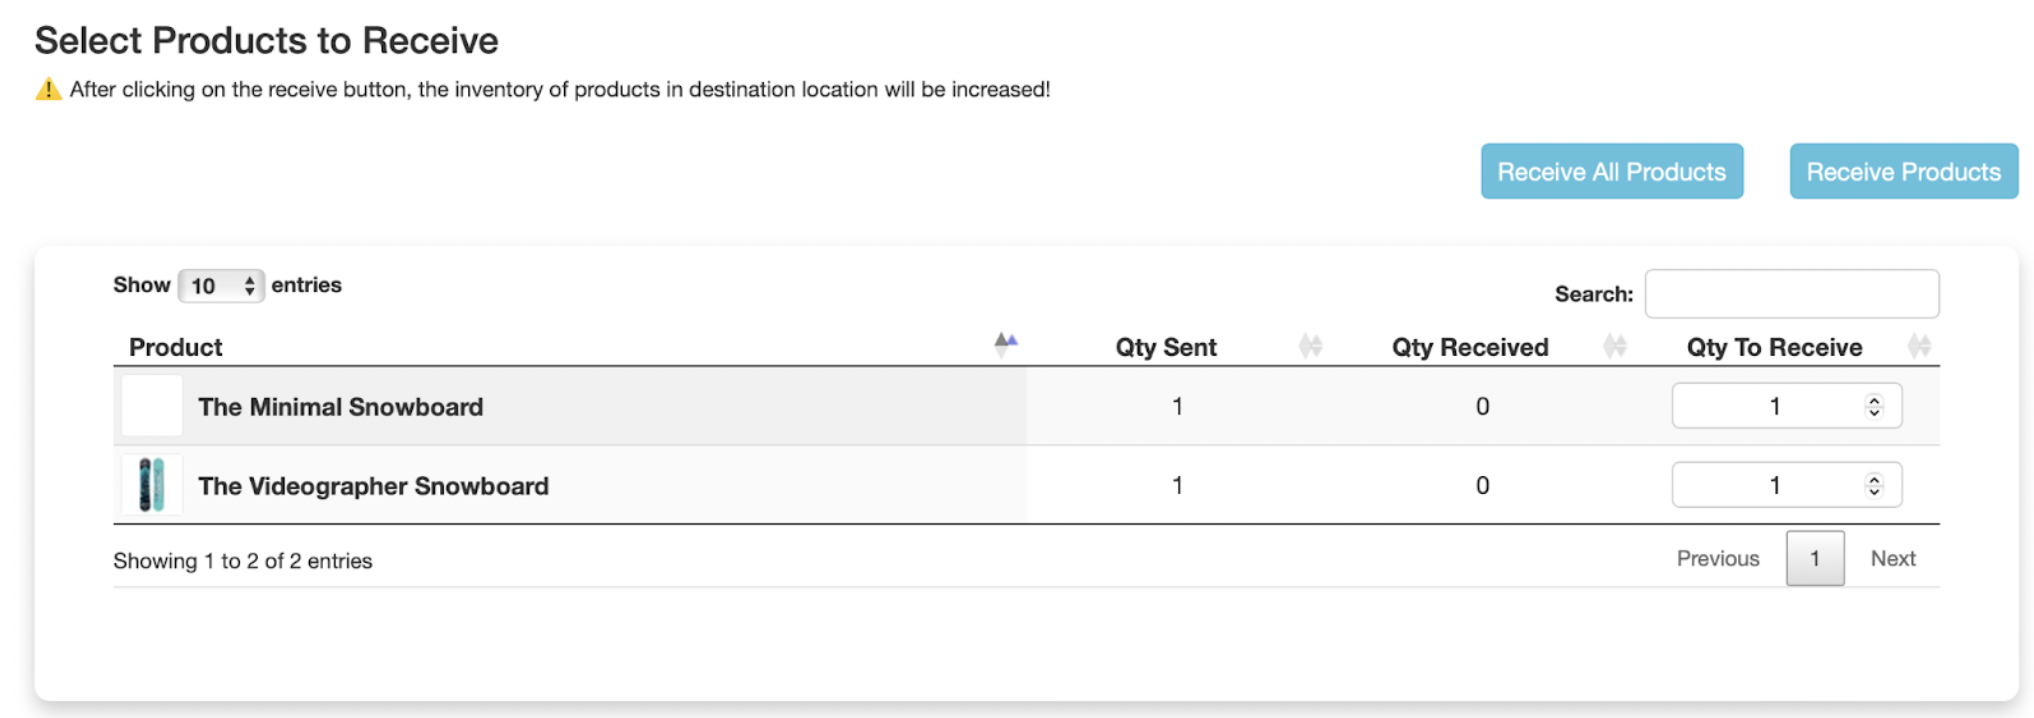
If the store has got all products, choose the Receive All Products button. Otherwise, tick on the products and click on the Receive Products button.
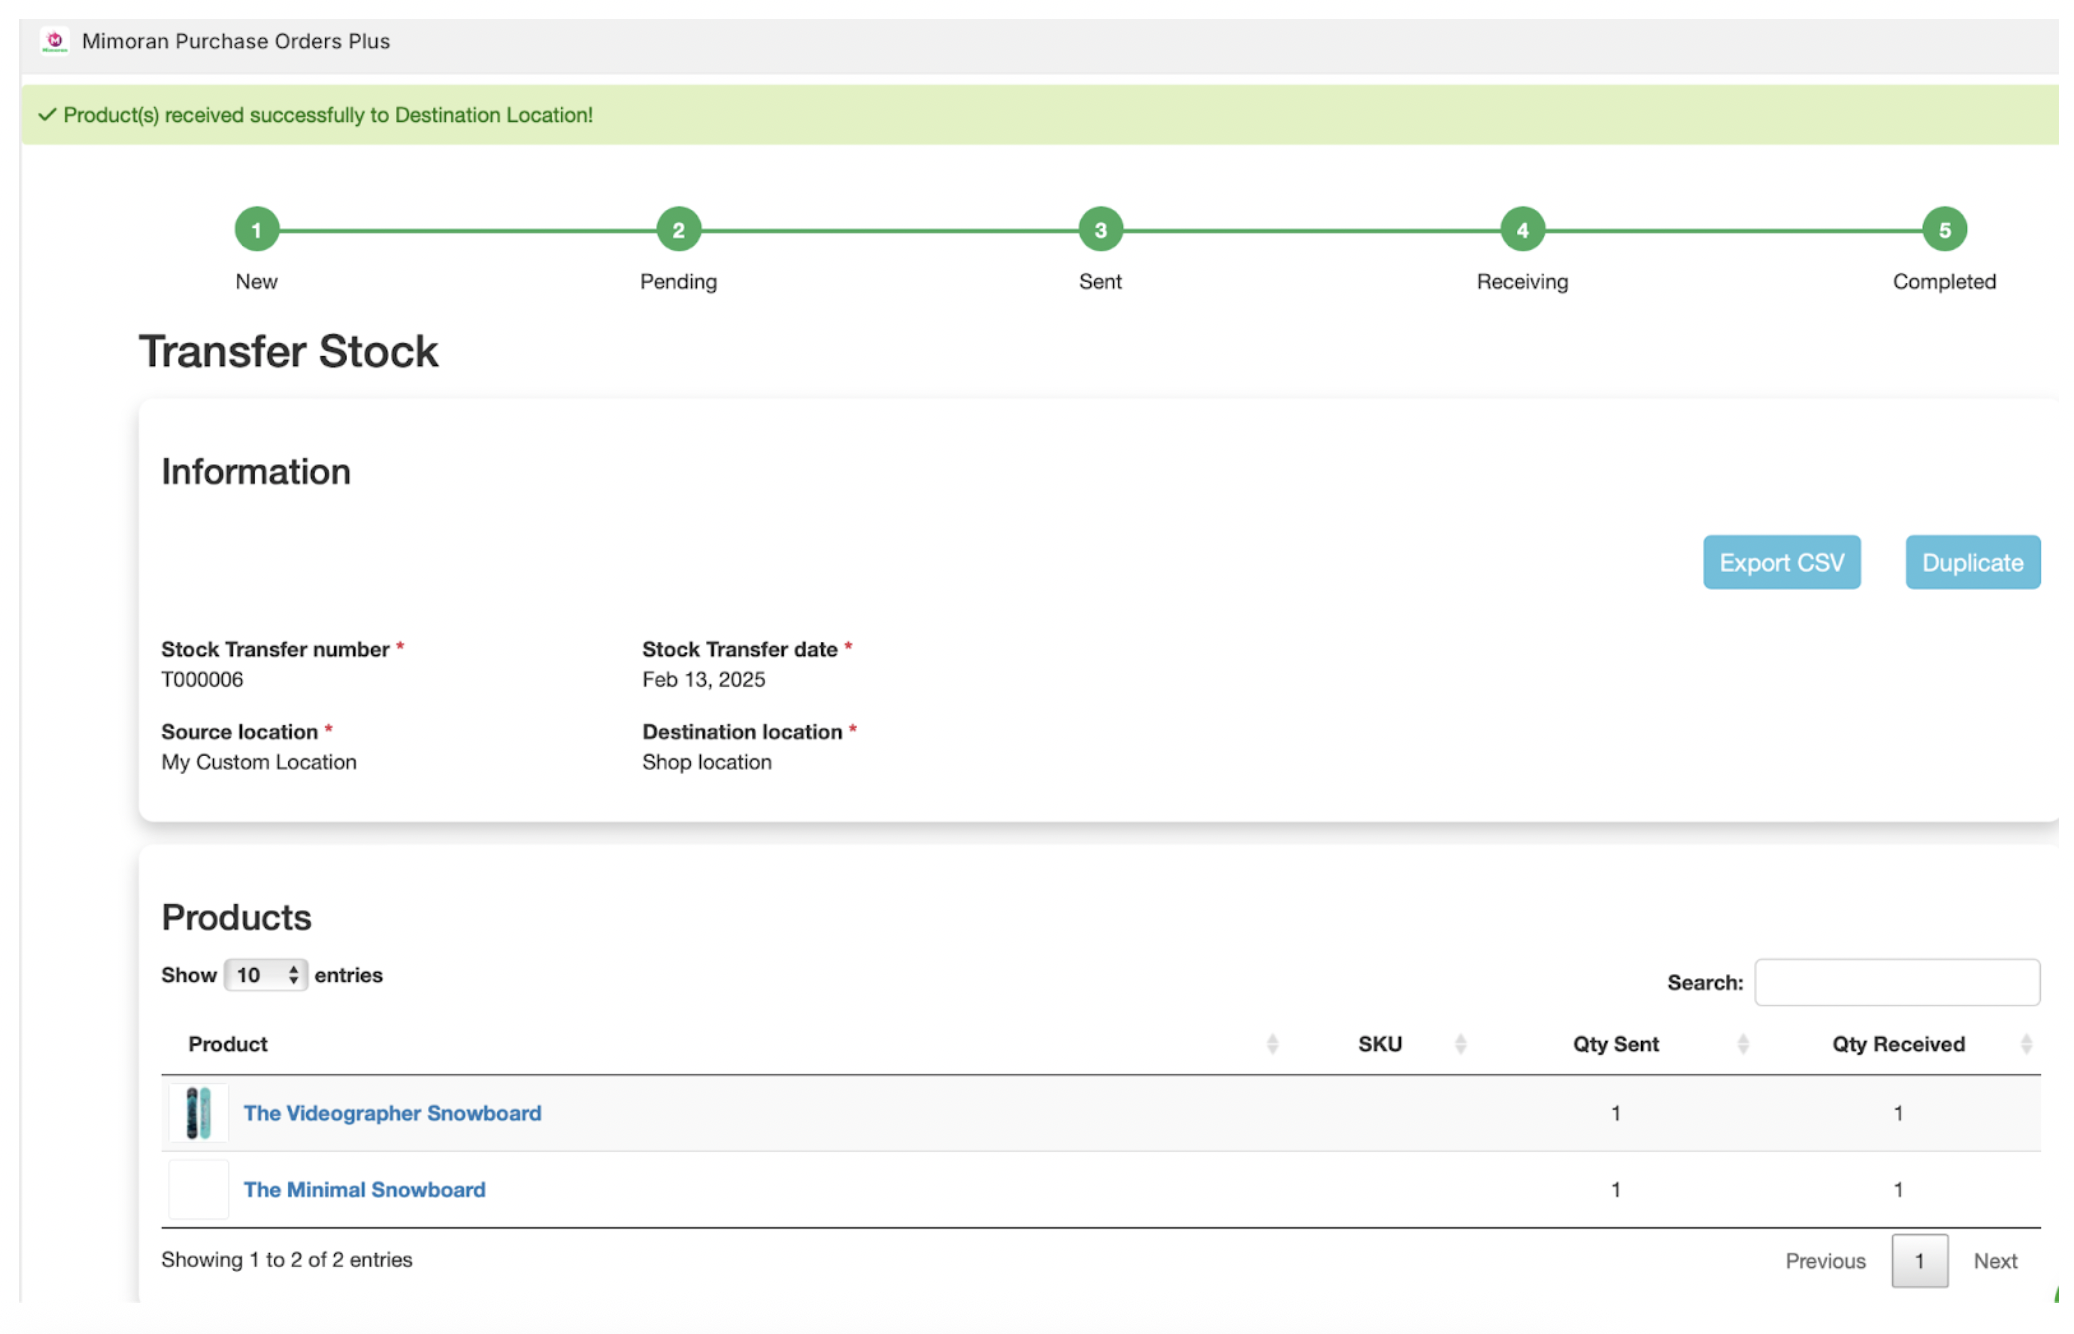
You will see a notification and the status is changed to Completed when all products are received.